
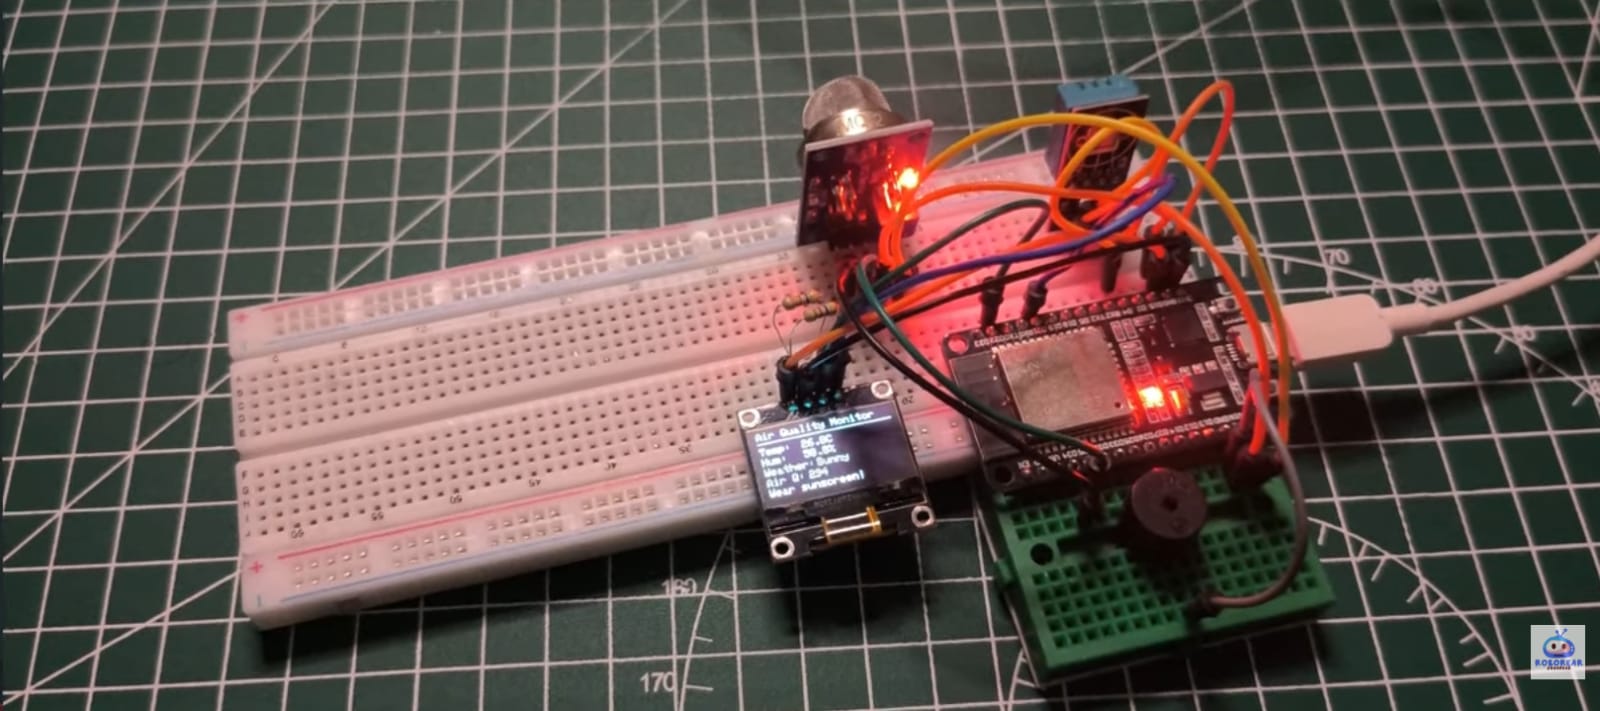
The "What's in My Air?" Moment | DIY Weather Station
I used to wonder about the air in my room.
Is it too humid? Too dry? Is the air quality actually good?
I bought an air purifier. It had a little light. Green meant good. Red meant bad.
But that's all it told me. No numbers. No trends. No idea what was actually happening.
So I built my own.
An ESP32. A few sensors. An OLED display.
Now I know exactly what's in my air. Temperature in degrees. Humidity as a percentage. Air quality from "Good" to "Hazardous."
And the best part? I can check it from my phone. Anywhere. Anytime.
This is the perfect intermediate project. More complex than a simple LED blinker. But not so hard that you'll give up.
Let's build it.
This video is hosted by YouTube. It loads only when you press play, and YouTube may then set cookies. Watch on YouTube
What You'll Build
A complete diy weather station that measures:
| Measurement | Sensor | Range |
|---|---|---|
| 🌡️ Temperature | DHT22 | -40°C to 80°C (±0.5°C accuracy) |
| 💧 Humidity | DHT22 | 0% to 100% (±2-5% accuracy) |
| 🌫️ Air Quality (CO2, smoke, NH3) | MQ2 | Relative measurement (Good → Hazardous) |
Display options:
Local OLED screen shows readings instantly
Web server lets you check from any device on your WiFi
Data updates every 2 seconds

What You'll Need
Hardware Components
| Component | Specs / Notes | Price (USD) |
|---|---|---|
| ESP32 Development Board | Any 30-pin version | $5.00 - $7.00 |
| DHT22 Temperature/Humidity Sensor | More accurate than DHT11 (±0.5°C) | $3.00 - $5.00 |
| MQ135 Air Quality Sensor | Detects CO2, smoke, NH3, benzene | $5.00 - $8.00 |
| 0.96" OLED Display | I2C, 128x64 pixels | $2.00 - $4.00 |
| 10kΩ Resistor | For DHT22 data line (pull-up) | $0.05 - $0.10 |
| Breadboard | 400 points | $1.00 - $2.00 |
| Jumper Wires | Male-to-female & male-to-male | $1.00 - $2.00 |
| USB Cable | For power and programming | $2.00 - $4.00 |
Total: ~$19.00 - $32.00 USD
Quick Buy Links
| Component | Where to Find |
|---|---|
| ESP32 Development Board | AliExpress |
| DHT11 Sensor | AliExpress |
| MQ2 Air Quality Sensor | AliExpress |
| 0.96" OLED Display | AliExpress |
| Breadboard + Jumper Kit | AliExpress |

Sensor Comparison: DHT11 vs DHT22
If you've seen the DHT11, you might wonder why I chose the DHT22.
| Feature | DHT11 | DHT22 (AM2302) |
|---|---|---|
| Temperature range | 0-50°C | -40 to 80°C |
| Temperature accuracy | ±2°C | ±0.5°C |
| Humidity range | 20-80% | 0-100% |
| Humidity accuracy | ±5% | ±2-5% |
| Sampling rate | 1 Hz (1 read/sec) | 0.5 Hz (1 read/2 sec) |
| Price | ~$2-3 | ~$3-5 |
| Best for | Basic projects | DIY Weather stations, accurate monitoring |
For a DIY weather station that actually tells you useful information, spend the extra dollar on the DHT22.
How the Sensors Work
DHT11 (Temperature + Humidity)
The DHT11 uses a capacitive humidity sensor and a thermistor to measure temperature. It sends digital data over a single wire.
Important: The DHT11 needs a 10kΩ pull-up resistor on the data line. Without it, readings will fail or be erratic.
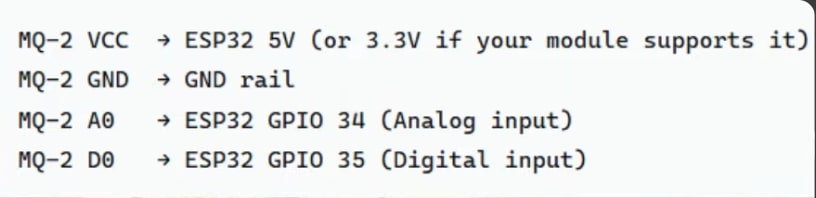
MQ135 (Air Quality)
The MQ135 is a chemical sensor. It has a heating element inside that makes it sensitive to various gases:
| Gas | Detected |
|---|---|
| Carbon dioxide (CO2) | ✅ Yes |
| Smoke | ✅ Yes |
| Ammonia (NH3) | ✅ Yes |
| Benzene | ✅ Yes |
| Formaldehyde | ✅ Yes |
The sensor outputs a higher voltage when it detects more pollutants. We read this analog value and convert it to a simple quality rating.
Important: The MQ135 needs to "warm up" for 5-10 minutes before giving stable readings. This is normal.
Wiring It Up
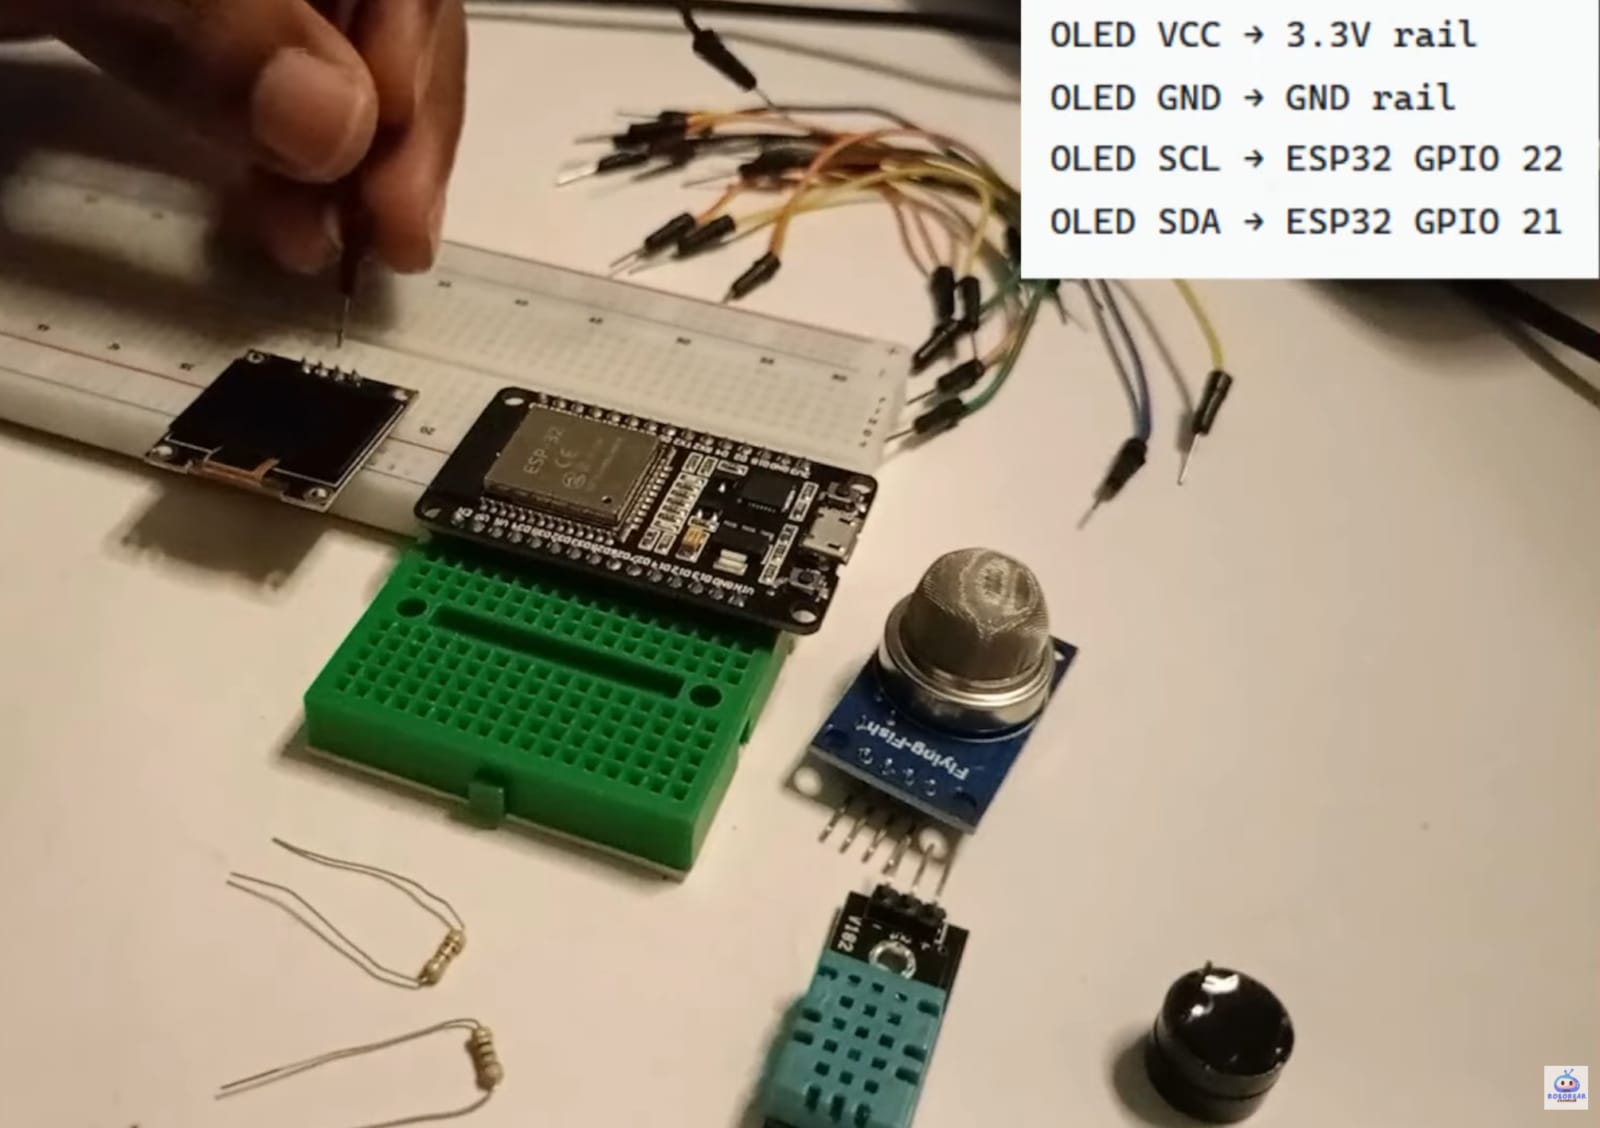
I2C OLED Display - DIY Weather Station
| OLED Pin | ESP32 Pin |
|---|---|
| VCC | 3.3V |
| GND | GND |
| SCL | GPIO 22 |
| SDA | GPIO 21 |
DHT11 Sensor - DIY Weather Station
| DHT11 Pin | ESP32 Pin | Notes |
|---|---|---|
| VCC | 3.3V | Use 3.3V, not 5V |
| GND | GND | |
| DATA | GPIO 4 | Add 10kΩ resistor from DATA to VCC |
MQ2 Air Quality Sensor - DIY Weather Station
| MQ2 Pin | ESP32 Pin | |
|---|---|---|
| VCC | 5V | MQ135 needs 5V power |
| GND | GND | |
| AO (Analog Out) | GPIO 34 | ADC input |
The Code - DIY Weather Station
Full code available on GitHub: https://github.com/shahrear-ab/roborear/blob/main/weather_station/weather_station.ino
Setting up VS Code and PlatformIO to Control Servo Motors – Robotics for Beginners: Learn ESP32 PlatformIO with VS Code | Blink LED Tutorial
Required Libraries - DIY Weather Station
Install these in Arduino IDE (Sketch → Include Library → Manage Libraries):
| Library | Author | Purpose |
|---|---|---|
| DHT sensor library | Adafruit | Reads DHT22 |
| Adafruit Unified Sensor | Adafruit | Required for DHT |
| Adafruit SSD1306 | Adafruit | Controls OLED display |
| Adafruit GFX | Adafruit | Graphics for OLED |
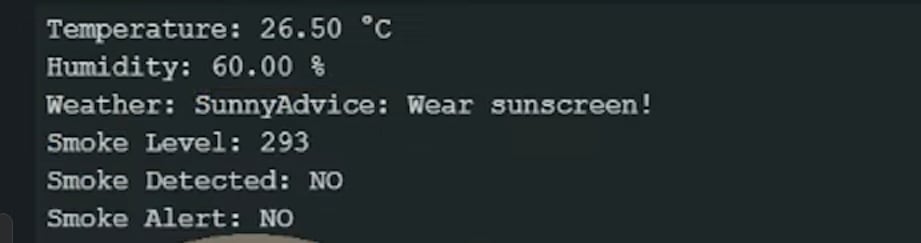
How to Read Air Quality Values - DIY Weather Station
The MQ135 outputs an analog value from 0 to 4095. Here's what the numbers mean:
| Raw Value | Air Quality Status | What It Means |
|---|---|---|
| < 300 | 🟢 Good | Clean air, normal conditions |
| 300 - 600 | 🟡 Moderate | Acceptable, some pollutants present |
| 600 - 900 | 🟠 Unhealthy for Sensitive | Children, elderly, respiratory issues may be affected |
| 900 - 1200 | 🔴 Unhealthy | Everyone may experience effects |
| > 1200 | ⚫ Hazardous | Emergency conditions |
Important: These thresholds are approximate. Your sensor may read higher or lower depending on your environment and calibration.
Identifying resistor values – How To Read Resistor Color Codes (And Never Burn an LED Again) | 4 Easy Steps
Testing Your DIY Weather Station
After Uploading
Open Serial Monitor (115200 baud)
Should show temperature, humidity, and air quality every 2 seconds
Check the OLED display
Should show all three readings clearly
Test the web server (if WiFi configured)
Open browser on phone or computer
Enter the ESP32's IP address (shown in Serial Monitor)
See readings in a clean web page
Testing Air Quality Response - DIY Weather Station
Normal room air: Baseline reading (usually 100-400)
Near a candle or incense: Reading should increase
Near cooking: Reading may spike
Exhaling directly on sensor: CO2 from breath increases reading
To get familiar with your MQ135 sensor, try these simple experiments. Light a match or incense stick about 30cm away from the sensor. Watch the Serial Monitor – you should see the air quality value rise within 10-15 seconds. The smoke particles are detected by the sensor, causing the voltage on the AO pin to increase. Once you move the smoke source away, the value should slowly return to baseline after 20-30 seconds.
You can also test with common household items. A spray of deodorant or perfume will cause a sharp spike. Cooking oil fumes from the kitchen will show a gradual increase. Even opening a bottle of vinegar nearby will register because the MQ135 is sensitive to acidic gases.
For a fun demonstration, have someone exhale directly onto the sensor from a few inches away. The carbon dioxide in their breath will cause a noticeable jump in readings. This shows how quickly air quality changes with human presence – useful for classroom demonstrations or understanding ventilation needs in a room.
Remember that extreme values (over 1000) may take several minutes to drop back to normal because the sensor absorbs gases and needs time to "clear" itself. This is normal behavior.
This video is hosted by YouTube. It loads only when you press play, and YouTube may then set cookies. Watch on YouTube
Make It Your Own (Upgrades) - DIY Weather Station
| Upgrade | Difficulty | What You'll Need |
|---|---|---|
| Add more sensors | ⭐ Easy | BMP280 (pressure), MQ7 (CO), MQ2 (combustible gas) |
| Data logging to SD card | ⭐⭐ Medium | MicroSD card module |
| Send data to cloud | ⭐⭐ Medium | Thingspeak, Blynk, or Firebase |
| Battery powered | ⭐⭐ Medium | 18650 battery + TP4056 |
| 3D printed case | ⭐⭐ Medium | 3D printer or laser cutter |
| Telegram alerts | ⭐⭐⭐ Hard | Telegram bot API |
| Historical graphs | ⭐⭐⭐ Hard | InfluxDB + Grafana |
Troubleshooting
| Problem | Likely Cause | Fix |
|---|---|---|
| DHT22 reads "nan" | Missing pull-up resistor | Add 10kΩ resistor between DATA and VCC |
| MQ135 readings unstable | Sensor not warmed up | Wait 5-10 minutes for stabilization |
| OLED shows nothing | Wrong I2C address | Try address 0x3C or 0x3D |
| Air quality always 4095 | AO pin not connected | Check jumper from MQ135 AO to ESP32 GPIO 34 |
| Air quality always 0 | MQ135 not powered | Check VCC to 5V, GND to GND |
| WiFi not connecting | Wrong credentials or 5GHz network | Use 2.4GHz network, check SSID/password |
Why DHT22 Over DHT11? - DIY Weather Station
| Reason | Explanation |
|---|---|
| Accuracy matters | ±0.5°C vs ±2°C makes a real difference |
| Better range | Sub-zero temperatures and 0-100% humidity |
| Reliability | Fewer failed readings |
| Cost difference | Only ~$2 more |
The DHT11 is fine for learning. But for a real weather station, the DHT22 is worth the extra dollar.
If your DHT22 still shows "nan" after adding the pull-up resistor, try a different GPIO pin. Some ESP32 pins have better performance for one-wire sensors. GPIO 4, 13, and 14 are good alternatives. Also, the DHT22 requires precise timing. If your code has long delays or heavy WiFi operations, the sensor reading may timeout. Move sensor readings to the beginning of your loop and add a 2-second delay between reads – the DHT22 needs at least 1.8 seconds between measurements anyway.
If your MQ135 readings fluctuate wildly even after warm-up, check for airflow. The sensor is sensitive to drafts from fans, air conditioners, or open windows. Place it in a stable environment for consistent readings. You can also add software smoothing by averaging 10 readings and dividing by 10. This reduces noise without losing responsiveness.
If your OLED display works but shows garbage or random pixels, check your I2C connections. Loose wires can cause data corruption. Also verify that you have the correct display driver in your code. Some 0.96" OLEDs use the SH1106 driver instead of SSD1306. The symptoms look similar but the fix is simply changing the library.
For WiFi issues, try powering your ESP32 from a phone charger instead of your computer's USB port. Computer ports sometimes provide unstable power that affects the WiFi radio.

Real-World Applications - DIY Weather Station
| Use Case | How It Helps |
|---|---|
| Home air quality monitor | Know when to open windows or run purifier |
| Greenhouse controller | Maintain optimal temp/humidity for plants |
| Server room monitor | Alert before equipment overheats |
| Classroom demonstration | Show how CO2 rises when room is full |
| Cigar humidor monitor | Maintain perfect humidity |
| Pet enclosure monitor | Keep reptiles or amphibians healthy |
🎥 Watch the Step-by-Step Video Tutorial - DIY Weather Station
Prefer watching over reading? See the complete DIY weather station build in action:
📺 ESP32 DIY Weather Station with Air Quality Monitor
👉 Don't forget to Subscribe to Roborear on YouTube for more beginner-friendly electronics and IoT projects every week!
Your Turn - DIY Weather Station
This project taught me that you don't need expensive commercial air quality monitors. A $20 ESP32 and a few sensors give you more control, more data, and a much better understanding of what's actually happening.
Now go build yours. Let it run for a day. Notice how the air quality changes when you cook, when you open a window, when the room gets crowded.
That's the fun part.
FAQs
Frequently Asked Questions
1. Why is my MQ135 sensor showing constantly high or low readings? - DIY Weather Station
The MQ135 needs time to stabilize. When first powered on, it can take 5 to 10 minutes to reach normal operating temperature. During this warm-up period, readings will be erratic and unusually high. This is completely normal. If readings remain unstable after 15 minutes, check your wiring. The MQ135 requires 5V power, not 3.3V. Connecting to 3.3V will result in very low or no readings. Also, the sensor is affected by airflow. If it's near an air conditioner vent, fan, or open window, readings will fluctuate. For stable readings, place it away from direct airflow. Finally, the thresholds in the code may need adjustment for your specific sensor and environment. Run the sensor for 30 minutes in clean air, note the average reading, and adjust the threshold values accordingly.
2. Why does my DHT22 show "nan" or random values? - DIY Weather Station
"nan" means "Not a Number" – the sensor failed to return a valid reading. The most common cause is missing the 10kΩ pull-up resistor on the data line. Connect a 10kΩ resistor between the DATA pin and VCC (3.3V). Another common issue is timing. The DHT22 requires precise timing from the ESP32. WiFi operations can sometimes interfere. If you're using WiFi and getting frequent nan readings, add a delay between WiFi operations and sensor reads, or use a separate sensor read task. Check your wiring as well. The DHT22 has four pins, but only three are used: VCC, GND, and DATA. Make sure you're using the correct pins. Some DHT22 modules come with a built-in pull-up resistor – check your module's documentation. If issues persist, try a different GPIO pin or replace the sensor.
3. How can I make the weather station battery-powered? - DIY Weather Station
Yes, you can make this project portable! The ESP32 has deep sleep modes that draw very little power (as low as 10µA). Power requirements: ESP32 active mode: ~150-250mA DHT22: ~1mA MQ135: ~150mA (heater element) – this is your biggest power draw OLED display: ~10-20mA To run on batteries: Use 2x 18650 lithium batteries (provides ~7.4V) Add a voltage regulator (5V for MQ135, 3.3V for ESP32 and sensors) Or use a 3.7V LiPo battery with a boost converter To save power: Put ESP32 into deep sleep between readings Power MQ135 only when taking measurements (it needs 60 seconds warm-up) Use a MOSFET to completely cut power to sensors when not in use Estimated battery life: With deep sleep and minimal readings, a 2000mAh battery could last several days. Without power saving, 1-2 hours maximum. For a more detailed guide on ESP32 deep sleep, check out the ESP32 deep sleep tutorial link in the internal links section below.
4. Why is my MQ135 air quality sensor showing very high or inconsistent readings even in clean air? - DIY Weather Station
The MQ135 is a chemical sensor that needs time to stabilize. When first powered on, it can take 5 to 15 minutes to reach normal operating temperature. During this warm-up period, readings will be erratic and unusually high. This is completely normal. Another common issue is that the MQ135 is sensitive to many gases including CO2, smoke, ammonia, benzene, and even humidity. If you breath directly on the sensor, the CO2 from your breath will cause a spike. Place the sensor away from air vents, open windows, and your own breathing when testing. The sensor also requires calibration for accurate absolute readings. The thresholds in the code (300 = Good, 600 = Moderate, etc.) are approximate. Let the sensor run for 30 minutes in your environment, note the average reading, then adjust the threshold values in the code accordingly. Finally, check your wiring. The MQ135 needs 5V power – connecting to 3.3V will give very low or no readings. Make sure the AO (Analog Output) pin is connected to an ESP32 ADC pin like GPIO 34.
5. Can I add more sensors to this weather station? What sensors do you recommend? - DIY Weather Station
Yes, absolutely! The ESP32 has multiple ADC pins and I2C capabilities, so you can easily expand your weather station. Here are the most useful sensors to add: BMP280 or BME280 adds barometric pressure measurement. The BME280 also measures temperature and humidity, making it a good backup or replacement for the DHT22. It uses I2C, so it shares the SDA and SCL pins with your OLED display. Price: $3-5. MQ7 carbon monoxide sensor detects CO gas – useful for garage or kitchen safety. It needs preheating time like the MQ135. Price: $6-8. DS18B20 waterproof temperature sensor is great for measuring soil temperature, water temperature, or outdoor conditions. It uses a one-wire protocol and can be placed far from the ESP32. Price: $2-4. Rain drop sensor detects rainfall – perfect for a complete outdoor weather station. It gives analog output like the MQ135. Price: $3-5. To add multiple sensors, you'll need to manage pin assignments carefully. Use GPIO 34, 35, 36, 39 for analog sensors (they are input-only and perfect for this). Use I2C for multiple digital sensors on the same SDA/SCL pins (GPIO 21 and 22). Remember that each sensor adds power consumption, so for battery-powered operation, you may need to power sensors only when taking readings.
Tags