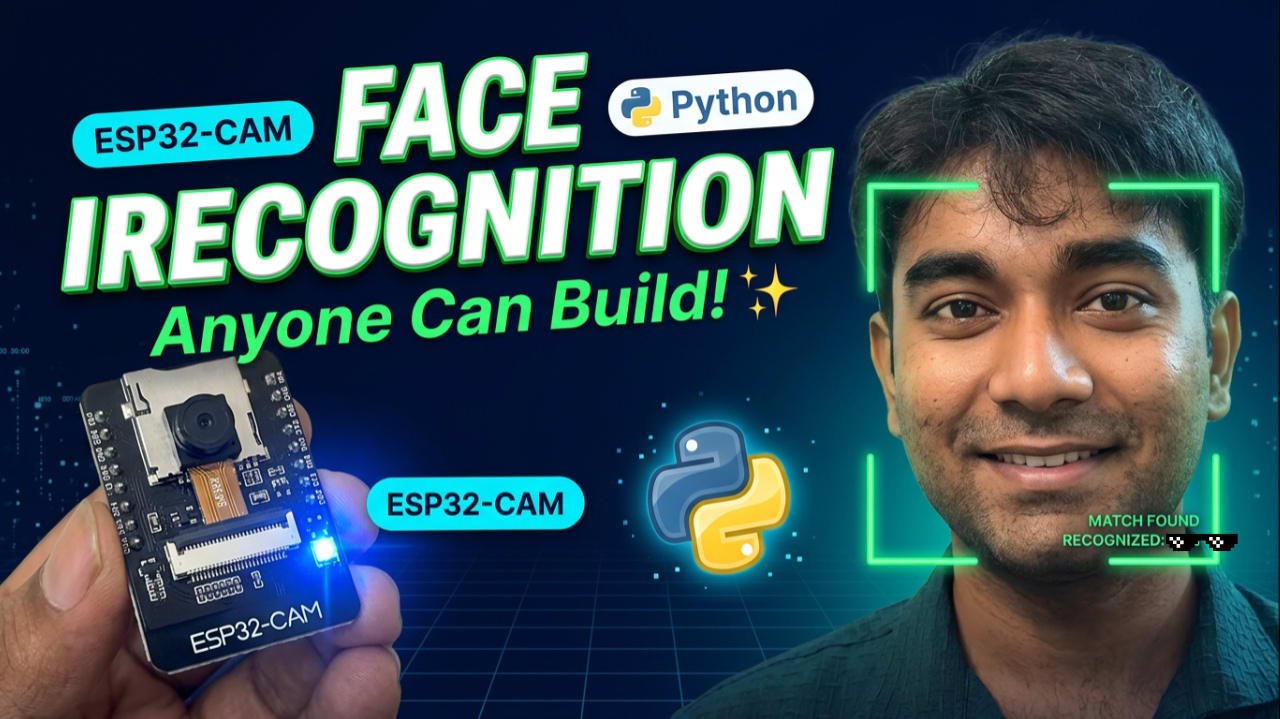

The Day My Face Recognition Called Me "UNKNOWN"
I stood in front of my ESP32 CAM, smiling. | ESP32 Cam Face Recognition System fingers crossed with hope.
The screen flashed: "UNKNOWN"
I moved closer. Adjusted the lighting. Tilted my head.
"UNKNOWN"
I showed it a photo of Elon Musk.
"UNKNOWN"
I showed it a photo of myself again.
"UNKNOWN"
Three days. Forty-seven attempts. Countless Google searches. And my face recognition system still didn't know who I was.
I was ready to throw the whole project into the trash.
But then, something clicked. And when it finally worked – when that green box appeared around my face with my name and "98.4%" confidence – I literally punched the air.
This is the story of how I built an ESP32 CAM face recognition attendance system, fought with Python packages for hours, and finally won.
And I'm going to show you exactly how to do it without losing your mind.
This video is hosted by YouTube. It loads only when you press play, and YouTube may then set cookies. Watch on YouTube
What Are We Building?
Imagine this:
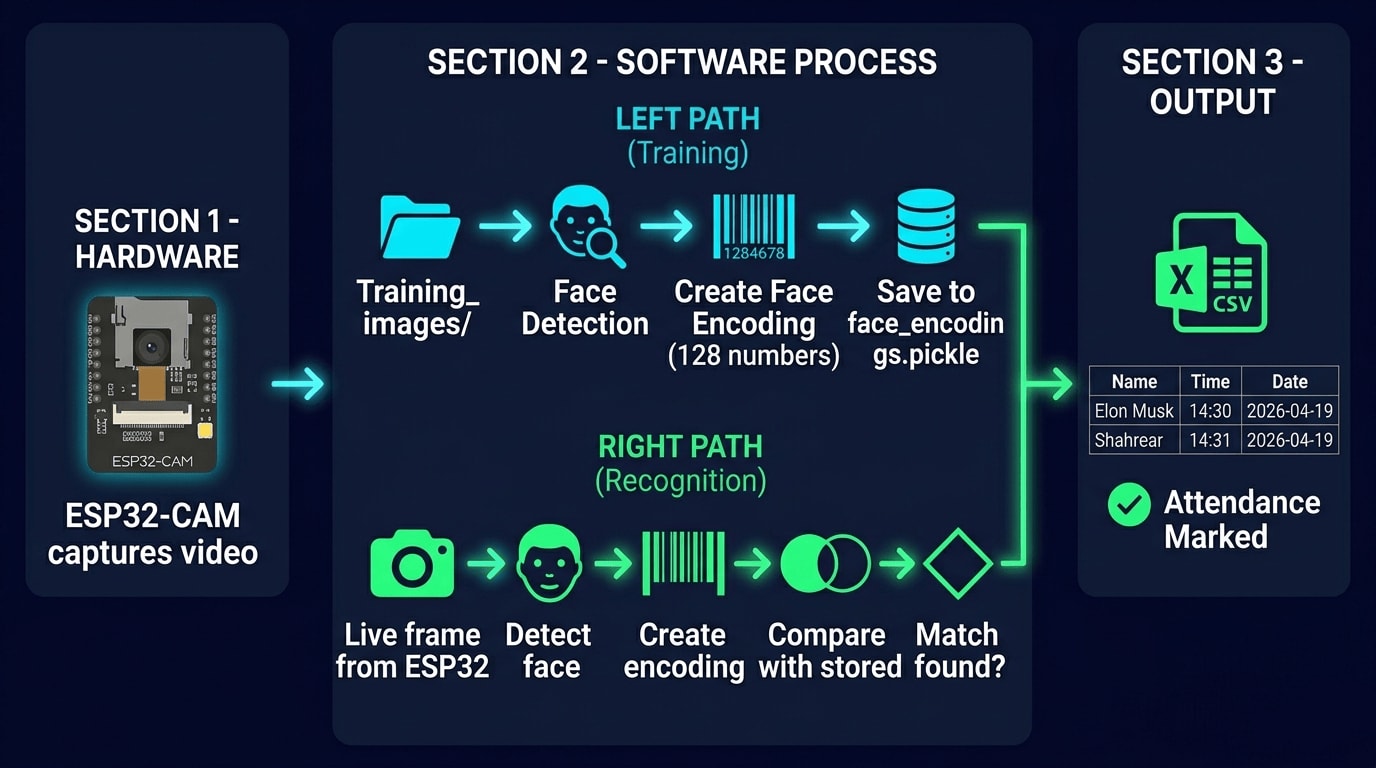
You walk into a room. An ESP32 CAM watches. In less than a second, your face is recognized. Your name appears on screen. Your attendance is automatically logged in a CSV file with the exact time and date.
No fingerprint scanner. No ID card. No manual entry.
Just your face.
That's what we're building.
| Component | What It Does |
|---|---|
| ESP32 CAM | Captures live video and streams it over WiFi |
| Python Script | Fetches frames, detects faces, recognizes who they are |
| Deep Learning Model | The brain that actually recognizes faces (99.38% accurate) |
| CSV File | Logs attendance with timestamps |
The Problem That Almost Made Me Quit
Before we get to the working version, let me tell you about the nightmare.
I had Python 3.14 installed. I thought "newer is better."
Wrong.
Every single package fought back:
| Package | What Happened |
|---|---|
| dlib | Required C++ compilation – failed for 2 hours |
| face_recognition | Couldn't find its own model files |
| numpy | Version conflicts with everything |
| opencv-python | Incompatible with numpy versions |
I saw errors like:
ModuleNotFoundError: No module named 'pkg_resources'Cannot convert longdouble infinity to integerPlease install face_recognition_models
I wanted to cry.
The fix? Python 3.12, not 3.14. And setuptools version 80.0.0, not the latest.
That single change saved everything.
What You'll Need
Hardware
| Component | Approx Price (USD) | Notes |
|---|---|---|
| ESP32 CAM Module | $8-12 | Includes OV2640 camera |
| FTDI Programmer | $3-5 | For uploading code (first time only) |
| USB Cable | $2-4 | Data cable, not just charging |
| Power Supply | $5-10 | Phone charger works fine |
Software (All Free)
| Software | Purpose |
|---|---|
| Python 3.12 | The programming language |
| VS Code or Arduino IDE | For ESP32-CAM code |
| Python Libraries | opencv, face_recognition, numpy, pandas |
Total hardware cost: ~$15-25 USD – less than a pizza with extra toppings!
Step 1: Setting Up the ESP32 CAM (The Camera)
The ESP32 CAM is the eye of our system. It captures video and streams it over WiFi.
Wiring the ESP32-CAM for Programming
| FTDI Programmer | ESP32-CAM |
|---|---|
| 5V | 5V |
| GND | GND |
| TX | U0R (GPIO 3) |
| RX | U0T (GPIO 1) |
Important: To upload code, connect GPIO 0 to GND, press reset, then upload. Remove the connection after uploading.
Quick Buy Links
| Component | Where to Find |
|---|---|
| ESP32 CAM Module | AliExpress |
| FTDI Programmer | AliExpress |
All the Codes Files:
📦 Complete Code on GitHub
Instead of cluttering this blog post with hundreds of lines of code, I've uploaded everything to GitHub. You'll find:
✅ Complete ESP32-CAM Arduino code (ready to upload)
✅ Full Python attendance script (copy-paste ready)
✅ requirements.txt with all dependencies
✅ Pre-configured User_Setup.h for TFT display (if using)
✅ Wiring diagrams
👉 Get the complete code here: https://github.com/roborear/esp32-cam-face-recognition
Read the readme.md; everything is described there.
⭐ Star the repo if it helps you – it really motivates me to create more projects!
The ESP32 CAM Code and
Upload this code to your ESP32 CAM using Arduino IDE or VS Code with PlatformIO: https://github.com/shahrear-ab/Face-Recognition-Attendance-System/blob/main/ESP32CAM_FaceRecognition/src/main.cpp
After uploading, open Serial Monitor (115200 baud). You'll see:
text
CAMERA OK
WiFi connected
http://192.168.x.x
Server started
Copy that IP address. You'll need it for the Python script.
Step 2: Setting Up Python (The Brain)
This is where the magic happens. But be careful – this is also where I lost two days.
The Golden Rule: Use Python 3.12
Not 3.14. Not 3.13. Python 3.12.
Everything works on 3.12. Nothing works on 3.14.
Create a Virtual Environment
bash
# Navigate to your project folder
cd C:\Users\YourName\ATTENDANCE

# Create virtual environment with Python 3.12
py -3.12 -m venv .venv

# Activate it (Windows)
.venv\Scripts\activate

# You should see (.venv) in your prompt
Install Packages in the RIGHT Order
This order is CRITICAL. I learned this the hard way.
bash
# First, install the correct version of setuptools
pip install setuptools==80.0.0

# Then install dlib (pre-compiled, no compilation needed)
pip install dlib-bin

# Then face_recognition
pip install face_recognition

# Finally, other packages
pip install opencv-python pandas numpy
Why this order?
setuptools 80.0.0 works with face_recognition_models
dlib-bin avoids C++ compilation hell
face_recognition pulls the models correctly
Step 3: Preparing Training Images
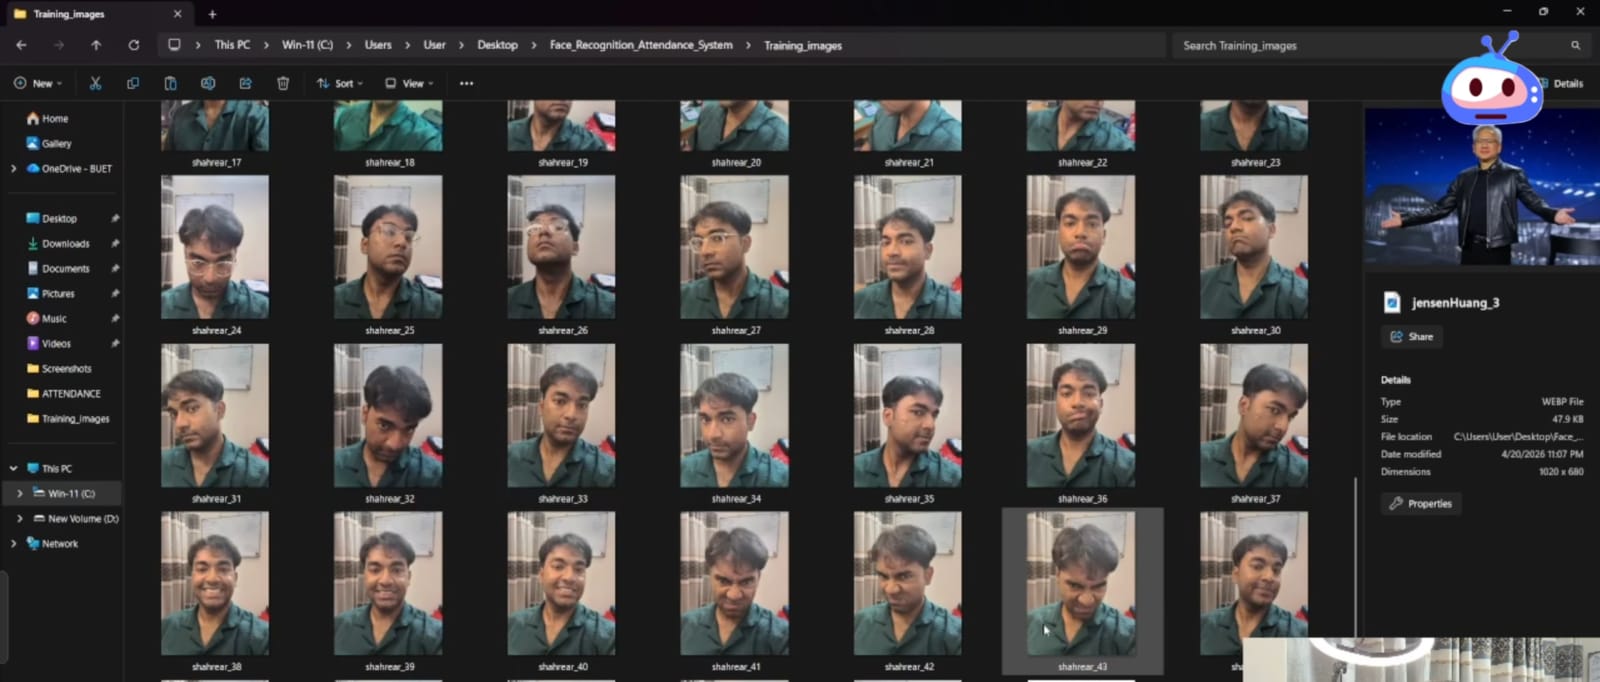
The system needs to learn what faces look like. Create a folder called Training_images and add photos:
text
Training_images/
├── your_name_1.jpg
├── your_name_2.jpg
├── your_name_3.jpg
├── elon_musk_1.jpg
├── elon_musk_2.jpg
└── mark_zuckerberg_1.jpg
Tips for good training images:
| ✅ DO THIS | ❌ DON'T DO THIS |
|---|---|
| Front-facing photos | Side profiles |
| Good lighting | Dark or shadowy images |
| Clear, sharp images | Blurry photos |
| 2-5 images per person | One image only |
| Different expressions | Same photo repeated |
Step 4: The Complete Python Code
Here's the full attendance system code. Save it as face_detection_attendance.py:
VS Code + PlatformIO Setup: If you have a blog explaining how to set up the professional coding environment instead of the default Arduino IDE Robotics for Beginners: Learn ESP32 PlatformIO with VS Code | Blink LED Tutorial
Step 5: Running the System
First Run (Training)
bash
python face_detection_attendance.pyThe system will:
Detect faces in your
Training_imagesfolderGenerate face encodings (mathematical representations)
Save them to
face_encodings.pickle
You should see:
text
🔄 Training face recognizer...
  ✅ Your Name ← your_name_1.jpg
  ✅ Your Name ← your_name_2.jpg
  ✅ Elon Musk ← elon_musk_1.jpg

✅ TRAINING COMPLETE!
   Your Name: 2 image(s)
   Elon Musk: 1 image(s)
   TOTAL: 2 person(s)
Live Recognition
After training, the system will:
Connect to ESP32 CAM
Show live video feed
Draw green boxes around recognized faces
Show confidence percentages
Log attendance to
Attendance.csv
This video is hosted by YouTube. It loads only when you press play, and YouTube may then set cookies. Watch on YouTube
What The CSV File Looks Like
Open Attendance.csv in Excel or Notepad:
csv
Name,Time,Date
YOUR NAME,09:15:23,2026-04-19
ELON MUSK,09:16:45,2026-04-19
Each person is logged only once per day.
This attendance system uses face recognition, but if you want to build simpler ESP32 projects first, check out my [ESP32 Pomodoro Timer] for learning sensors.
Troubleshooting (What I Learned)
The "Unknown" Face Problem
| Symptom | Fix |
|---|---|
| Always shows UNKNOWN | Lower tolerance in compare_faces(..., tolerance=0.6) |
| Wrong person recognized | Add more training images (3-5 per person) |
| No face detected | Check lighting – add more light |
The Python Package Nightmare
| Error | Solution |
|---|---|
| No module named 'pkg_resources' | pip install setuptools==80.0.0 |
| dlib compilation failed | pip install dlib-bin (not dlib) |
| numpy version conflict | Use Python 3.12, not 3.14 |
ESP32 CAM Connection Issues
| Problem | Fix |
|---|---|
| Can't access IP in browser | Check ESP32 CAM is on same WiFi network |
| Connection timeout | Update IP address in Python code |
| Blurry image | Adjust focus ring on camera lens |
Upgrades and Ideas
Once you have the basic system working, here's how to level up:
| Upgrade | Difficulty | What You'll Need |
|---|---|---|
| Add more people | Easy | More training images |
| Email alerts on recognition | Medium | SMTP library |
| Save recognized face images | Medium | cv2.imwrite() |
| Telegram bot notifications | Medium | python-telegram-bot |
| Web dashboard | Hard | Flask + HTML |
| Multiple cameras | Hard | Multiple ESP32 CAMs |
The Moment It Finally Worked
After three days of fighting with Python packages, incorrect versions, and mysterious errors, I stood in front of the camera one more time.
The green box appeared.
"SHAHREAR (68.4%)"
The buzzer on my desk didn't go off. No fanfare. Just a quiet CSV file updating with my name and the current time.
But I knew. I had beaten the machine.
And now you can too.
Your Turn
This project taught me that the biggest enemy isn't the code – it's the environment. Python versions, package conflicts, missing dependencies. That's where projects go to die.
But once you get past that? The actual face recognition just works.
So go build it. Train it with your face. Show it to your friends. Watch it recognize Elon Musk and Mark Zuckerberg correctly (yes, it can tell them apart).
And when that green box appears with your name, you'll know exactly what I felt.
Prefer watching over reading? Join the Roborear community on YouTube https://www.youtube.com/channel/UCLbwg7Eo1UNTX45oeNBtk4A/
FAQs
Frequently Asked Questions
1. Why is my ESP32-CAM not connecting or showing "Failed to connect to ESP32" error?
This is the most common issue beginners face when programming the ESP32-CAM. Here are the usual causes and fixes: GPIO 0 not grounded during upload: The ESP32-CAM needs to be put into flashing mode. Before clicking Upload in Arduino IDE, connect GPIO 0 to GND, press the RESET button, then release both. After upload completes, disconnect GPIO 0 from GND . Wrong board selected: Make sure you have selected "AI Thinker ESP32-CAM" from Tools → Board → ESP32 Arduino. Also set Partition Scheme to "Huge APP (3MB No OTA/1MB SPIFFS)" . Power supply issues: The ESP32-CAM needs stable 5V power. Computer USB ports sometimes don't provide enough current. Try using a dedicated 5V phone charger (2A recommended). FTDI wiring incorrect: Double-check your connections: FTDI TX → ESP32-CAM U0R (GPIO 3), FTDI RX → ESP32-CAM U0T (GPIO 1), 5V → 5V, GND → GND.
2. Why does my Python script show "Please install face_recognition_models" even though I already installed it?
This is a very common dependency issue that frustrates many developers. The problem occurs because face_recognition_models requires the pkg_resources module from setuptools, which is not always installed automatically. The fix: Run this command in your terminal or command prompt: bash -> pip install setuptools If that doesn't work, try the complete solution: bash -> pip uninstall face_recognition face_recognition_models dlib -y pip install setuptools wheel pip install dlib-bin pip install face_recognition This issue happens because face_recognition_models is a source distribution (tar.gz), not a pre-built wheel, and its installation process has dependency resolution gaps . Installing setuptools first ensures the pkg_resources module is available when face_recognition tries to load its model files.
3. What is the accuracy of this face recognition system? How far can the person stand from the camera?
The accuracy depends on several factors including lighting, distance, and image quality. Here's what you can expect: Good lighting (bright room): 98-100% accuracy at distances of 50cm to 150cm. Poor lighting (dim room): Accuracy drops to around 78-80% at close range, and continues to decrease with distance. Recognition speed: Takes approximately 1.3 to 2.0 seconds to recognize a face, depending on distance. Optimal distance: 50-100 cm (about arm's length) gives the best balance of accuracy and speed. Factors that reduce accuracy: Wearing hats or glasses simultaneously can drop accuracy to around 78%, and low-light conditions significantly impact performance. Pro tip: For best results, mount the ESP32-CAM at a fixed position (like a doorway or desk) with consistent lighting. The system works well for attendance marking where people stand at a predictable distance from the camera.
Affiliate Disclosure
Some links in this post are affiliate links. If you purchase through them, I may earn a small commission at no extra cost to you. This helps support Roborear. Thanks!
Tags