

The “It’s Alive!” Moment – Otto Robot
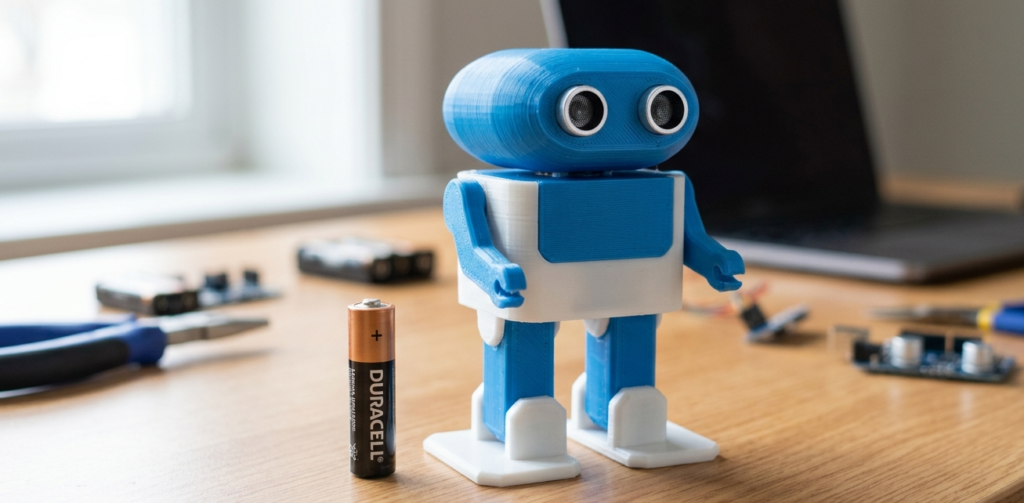
There’s something magical about building a robot that walks.
Not a car that rolls. Not an arm that waves. A walking, dancing, obstacle-avoiding humanoid robot that fits in the palm of your hand.
I remember the first time I powered up my Otto. The servos twitched. The legs moved. It took a shaky step forward.
My heart raced.
This wasn’t a kit that snapped together. This was my robot. My code. My wiring. My 3D-printed parts.
And it was walking.
Today, I’m going to show you how to build your own Otto robot. No soldering required. Just components, patience, and about an hour of assembly.
What is Otto Robot?
Otto is a completely open-source, Arduino-compatible humanoid robot . It walks, dances, makes sounds, and avoids obstacles using an ultrasonic sensor .
The best part? Anyone can build one. No soldering. No complex tools. Just a screwdriver and some patience.
| Feature | What It Does |
|---|---|
| 🦿 4 Servo Motors | Control legs and feet for walking and dancing |
| 👁️ Ultrasonic Sensor | Detects obstacles for autonomous navigation |
| 🔊 Buzzer | Plays sounds and melodies |
| 📱 Bluetooth (optional) | Control Otto from your phone |
| 🎨 3D Printed Body | Customizable colors and designs |
Otto was inspired by another open-source robot called Zowi, but Otto is smaller (11cm x 7cm x 12cm), more accessible, and has a cleaner design . It’s the perfect first humanoid robot.
How Otto Robot Works (Simple Explanation)
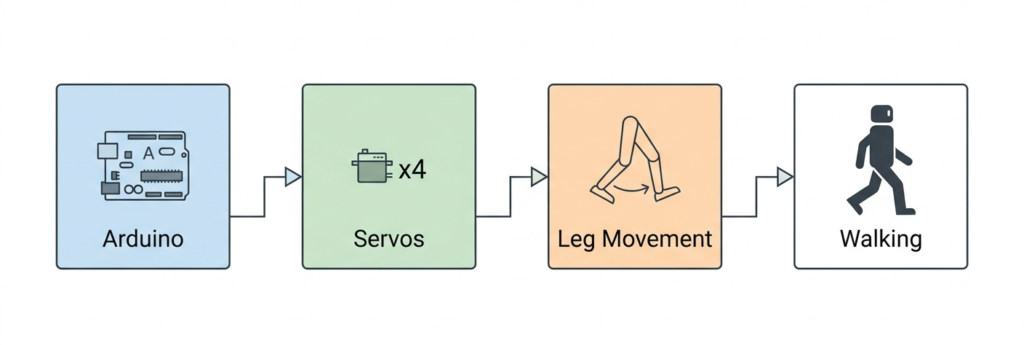
Otto’s brain is an Arduino (Nano or ESP32). It controls four servo motors that move the legs.
Here’s what happens when Otto walks:
The Arduino sends PWM signals to the servos
Servos rotate to specific angles
Legs lift, move forward, and plant
Repeat with opposite legs
An ultrasonic sensor on the chest measures distance to obstacles. When something gets too close, Otto backs up, turns, and walks away.
A buzzer adds sound effects. Bluetooth adds remote control from your phone.
All of this fits in a 3D-printed body that stands about 4 inches tall.
What You’ll Need – Otto Robot
Electronics Components
| Component | Quantity | Approx Price (USD) |
|---|---|---|
| Arduino Nano | 1 | 5.00−5.00−8.00 |
| SG90 Micro Servo (or MG90S for metal gears) | 4 | 8.00−8.00−12.00 ($2-3 each) |
| HC-SR04 Ultrasonic Sensor | 1 | 2.00−2.00−4.00 |
| Passive Buzzer | 1 | 0.50−0.50−1.00 |
| HC-05 or HC-06 Bluetooth Module (optional) | 1 | 4.00−4.00−6.00 |
| 4xAA Battery Holder | 1 | 2.00−2.00−3.00 |
| AA Batteries (rechargeable recommended) | 4 | 4.00−4.00−6.00 |
| Jumper Wires (Female-Female) | 20+ | 3.00−3.00−5.00 |
| USB Mini Cable | 1 | 2.00−2.00−4.00 |
Quick Buy Links (Affiliate) – Otto Robot
| Component | Where to Find |
|---|---|
| Arduino Nano | AliExpress |
| SG90 Servo (4-pack) | AliExpress |
| HC-SR04 Ultrasonic Sensor | AliExpress |
| HC-06 Bluetooth Module | AliExpress |
| Passive Buzzer | AliExpress |
| 4xAA Battery Holder | AliExpress |
| Jumper Wires (F-F, 20-pack) | AliExpress |
3D Printed Parts – Otto Robot
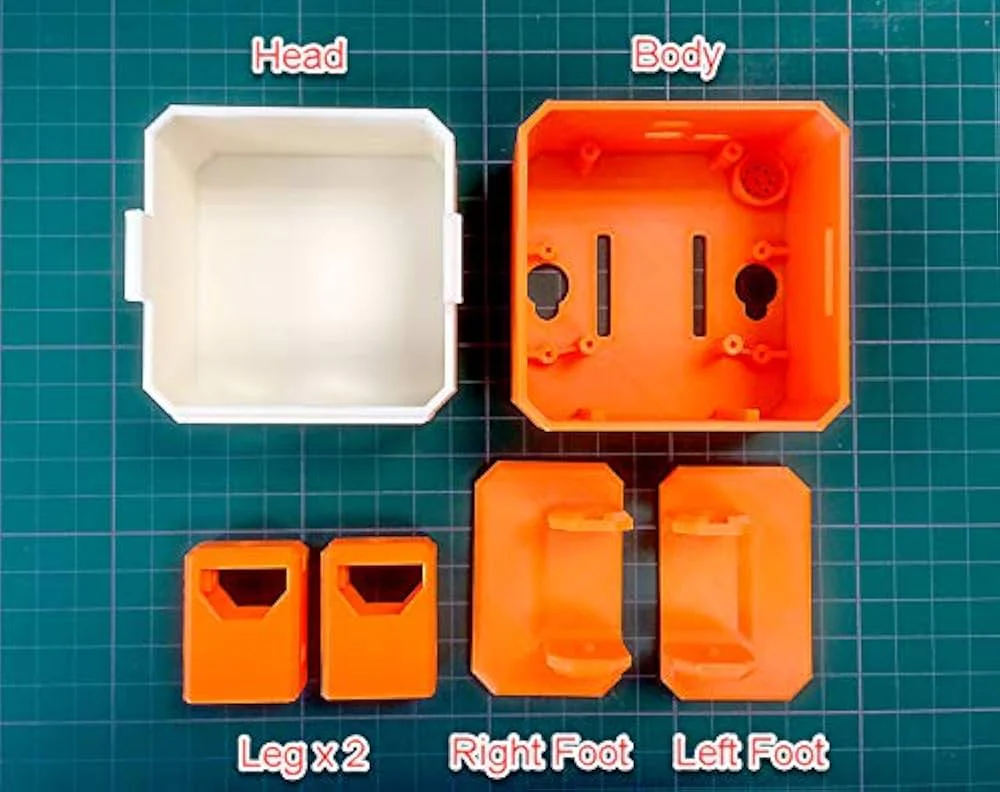
You’ll need to 3D print the robot’s body. Files are available for free from the official Otto DIY repository .
| Part | Quantity |
|---|---|
| Head | 1 |
| Body | 1 |
| Left Leg | 1 |
| Right Leg | 1 |
| Left Foot | 1 |
| Right Foot | 1 |
Printing settings:
Material: PLA
Layer height: 0.15mm
Infill: 20%
Supports: Needed only for certain parts
No 3D printer? Check local makerspaces, online printing services, or buy pre-printed parts from the official Otto DIY website.
Total cost: ~30−30−45 USD (excluding 3D printer)
Complete Wiring Guide – Otto Robot
Servo Connections
Each servo has three wires:
Brown/Black = Ground (GND)
Red = Power (5V)
Orange/Yellow = Signal (PWM)
| Servo | Arduino Pin |
|---|---|
| Left Leg (YL) | D2 |
| Right Leg (YR) | D3 |
| Left Foot (RL) | D4 |
| Right Foot (RR) | D5 |
⚠️ IMPORTANT: Power the servos from the battery pack, NOT from the Arduino’s 5V pin! Four servos moving simultaneously can draw 1.5A-2A, which will overload the Arduino’s voltage regulator.
Ultrasonic Sensor (HC-SR04)
| HC-SR04 Pin | Arduino Pin |
|---|---|
| VCC | 5V |
| GND | GND |
| TRIG | D8 |
| ECHO | D9 |
Buzzer
| Buzzer Pin | Arduino Pin |
|---|---|
| Positive (+) | D12 |
| Negative (-) | GND |
Bluetooth Module (HC-05/HC-06, Optional)
| Bluetooth Pin | Arduino Pin |
|---|---|
| VCC | 5V |
| GND | GND |
| TX | D6 (Arduino RX) |
| RX | D7 (Arduino TX) |
Note for HC-06: The LED will be SOLID when connected (not blinking). This is normal .
Power System – Otto Robot
Otto uses 4 AA batteries (6V total) to power the servos.
| Power Source | Voltage | Used For |
|---|---|---|
| 4xAA Batteries (via battery holder) | 6V | Servos (VCC on each servo) |
| Arduino USB or 7-12V input | 5V | Arduino, sensors, Bluetooth |
Wiring the power:
Battery Pack + → Servo VCC (all 4 servos in parallel)
Battery Pack - → Servo GND (all 4 servos) AND Arduino GND

Arduino 5V → Ultrasonic VCC, Bluetooth VCC (if used)
Common ground is essential! The battery negative and Arduino GND must be connected together.
Software Setup – Otto Robot
Required Libraries
Install these libraries via Arduino IDE Library Manager:
| Library | Author | Purpose |
|---|---|---|
| OttoDIYLib | Otto DIY | Contains walking gaits, gestures, sounds |
| SoftwareSerial | Built-in | For Bluetooth communication |
| Servo | Built-in | For servo control |
Installing OttoDIYLib
Open Arduino IDE
Go to Sketch → Include Library → Manage Libraries
Search for “OttoDIYLib”
Click Install
Setting Up the Arduino IDE
Select Board: Tools → Board → Arduino Nano
Select Processor: Tools → Processor → ATmega328P
Select Port: Tools → Port → (your Arduino’s COM port)
The Complete Code – Otto Robot
Code available at https://www.ottodiy.com/
Assembly Instructions – Otto Robot
Step 1: Prepare the Servos
Set each servo to 90 degrees (center position) before installing
Attach the servo horns/arms at 90 degrees using the small screws
The horns should be perpendicular to the servo body
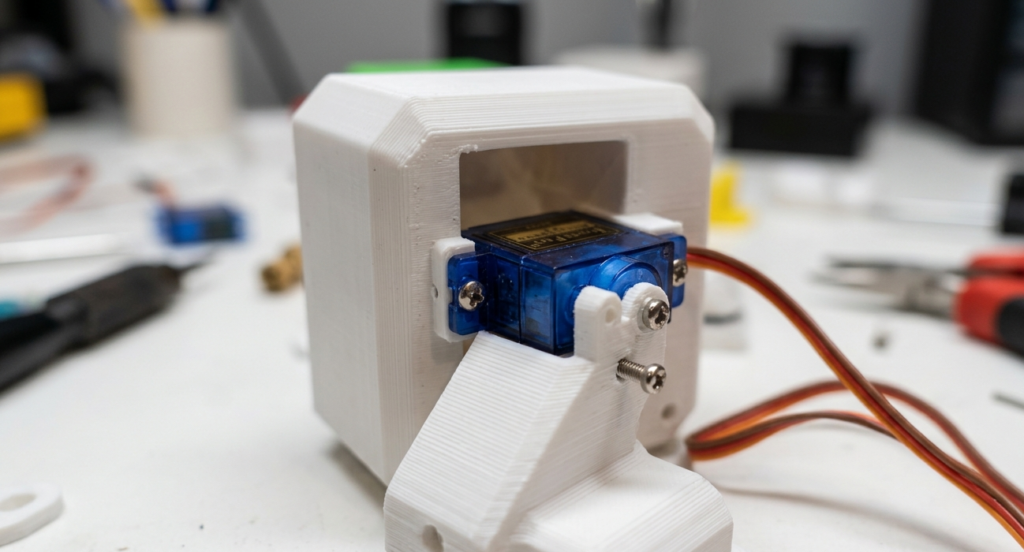
Step 2: Install Servos in 3D Printed Parts
| Part | Servo Position |
|---|---|
| Left Leg | Servo at top (hip joint) |
| Right Leg | Servo at top (hip joint) |
| Left Foot | Servo inside leg (ankle joint) |
| Right Foot | Servo inside leg (ankle joint) |
Screw the servos into the 3D printed parts using the small screws provided with the servos.
Step 3: Wire Everything
Follow the wiring guide above:
Connect all servos to the Arduino and power
Connect ultrasonic sensor to Arduino
Connect buzzer and Bluetooth (optional)
Connect battery pack to servos and Arduino ground
Step 4: Upload Code
Connect Arduino to computer via USB
Upload the code
Otto should center its servos and play a startup sound
Step 5: Final Assembly
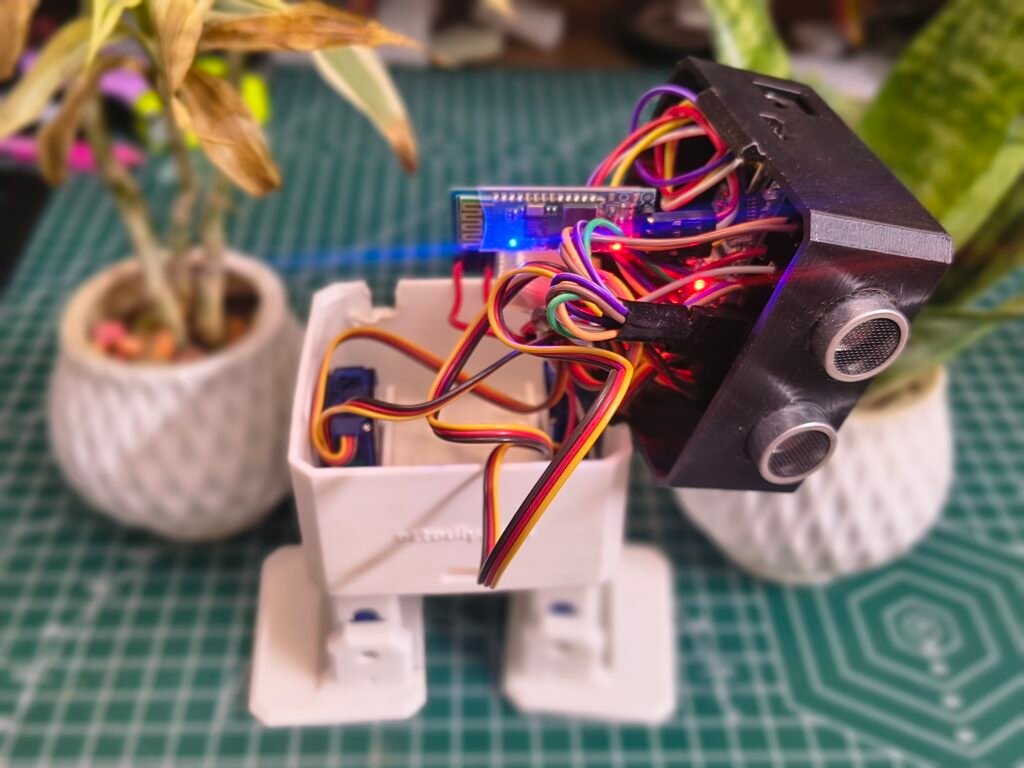
Carefully place all wires inside the body
Attach the head using small screws
Attach legs and feet
Close the body
Step 6: Calibration
After assembly, Otto’s legs may not be perfectly aligned. Run the calibration sketch to adjust each servo’s center position.
The Otto library has a calibration example that:
Moves each servo to its center
Allows you to adjust offsets
Saves calibration values to EEPROM
Bluetooth Control (Optional) – Otto Robot
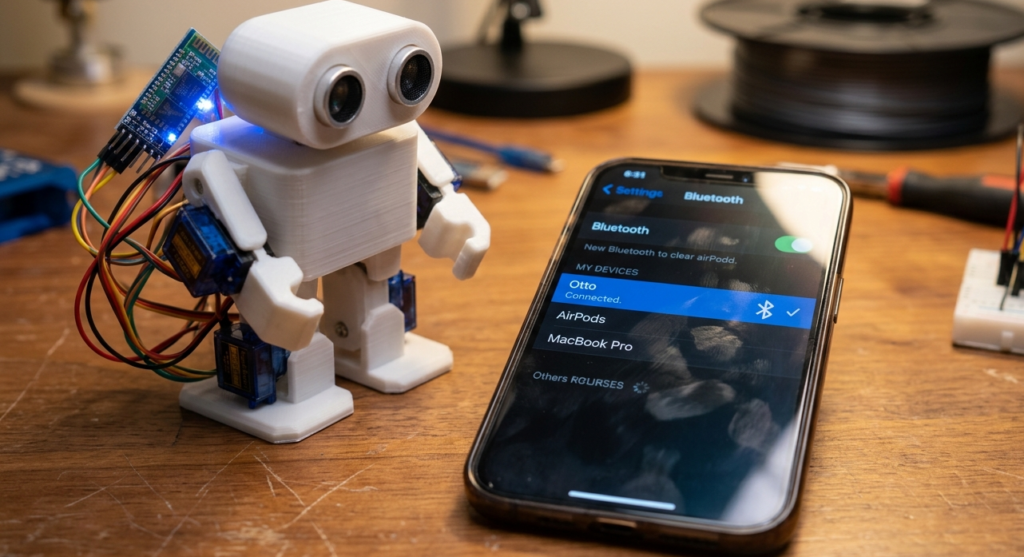
If you added the HC-06 module, you can control Otto from your phone:
Pair your phone to HC-06 (PIN: 1234 or 0000)
Download “Arduino Bluetooth Controller” or “Serial Bluetooth Terminal”
Connect to HC-06
Send commands: F = Forward, B = Backward, L = Left, R = Right, H = Happy, D = Dance
| Command | Action |
|---|---|
| F / f | Walk forward |
| B / b | Walk backward |
| L / l | Turn left |
| R / r | Turn right |
| S / s | Stop / Home |
| H / h | Happy gesture |
| C / c | Confused gesture |
| A / a | Angry gesture |
| D / d | Dance |
| O / o | Toggle obstacle avoidance mode |
(Photo: Phone connected to Otto via Bluetooth)
Make It Your Own (Upgrades) – Otto Robot
| Upgrade | Difficulty | What You’ll Need |
|---|---|---|
| Metal gear servos (MG90S) | ⭐ Easy | 4x MG90S servos (more durable) |
| LED eyes | ⭐ Easy | 2x LEDs + resistors |
| Sound sensor | ⭐⭐ Medium | Sound sensor module |
| Touch sensors | ⭐⭐ Medium | 3x touch sensors |
| Rechargeable battery | ⭐⭐ Medium | LiPo battery + charger |
| ESP32 version | ⭐⭐⭐ Hard | ESP32 board + custom body |
The official ESP32 version adds WiFi for OTA (over-the-air) updates and built-in Bluetooth .
Troubleshooting – Otto Robot
| Problem | Likely Cause | Fix |
|---|---|---|
| Servos don’t move | Power issue | Check battery connections. Use fresh batteries. |
| Servos twitch but don’t turn | Insufficient power | Servos need 6V (4xAA) minimum |
| Otto falls over | Legs not calibrated | Run calibration sketch |
| Ultrasonic not working | Wrong pins | Check Trig (D8) and Echo (D9) connections |
| Bluetooth not connecting | HC-06 needs pairing | PIN is 1234 or 0000. LED should be solid when connected |
| Otto walks backward | Servo direction reversed | Swap the two wires of the affected servo |
🎥 Watch the Complete Video Tutorial
👉 Don’t forget to Subscribe to Roborear on YouTube for more robotics tutorials every week!
Your Turn – Otto Robot
Building Otto taught me that robots don’t have to be complicated. Four servos, an ultrasonic sensor, and some code – that’s all it takes to create a walking, dancing friend.
Now go build yours. Watch it take its first steps. Teach it new dances.
And when it falls over? Pick it up. Adjust the code. Try again.
That’s how you learn robotics.

